Monday, August 8, 2011

Happy Italians!

 I made a stop at our mini-farmer's market downtown this past Friday.  I wasn't really looking for anything in particular, but I spotted these orange and yellow sweet banana peppers (3 for .75) and decided that I wanted to attempt to make stuffed peppers.  I have made stuffed bell peppers with ground beef and rice several times and didn't figure this would too much different, but in fact it ended up being a lot easier.

I'm not much of a sausage eater, but Michael loves it, so we compromised on 3 with sausage and 3 with a ricotta and zucchini mixture (the zucchini also from the farmer's market for .50)  I made a sauce with olive oil, tomato paste and sauce, garlic, onion, bell pepper seeds and fresh basil from my garden (and no cheese which is weird for Michael and I).

While that simmered I mixed the sausage with and egg and some  mozzarella, stuffed the peppers and made meatballs with what was left.  For the ricotta mixture I added zucchini, an egg and some spices.  Put the peppers in a olive oiled pan with the sauce and baked in the oven uncovered at 350 for about an hour.  We ate it with rosemary bread that Michael picked up at Sam's Club and an antipasto plate which was inspired by freshly ripened tomato and basil from my garden.  Yum!

Tuesday, July 26, 2011

M is for Maddox

My friend Mandy is expecting her second son, Maddox Blaze, this August.  Instead of a typical shower with toilet paper-diapers and bottles, we all went out to dinner and most importantly, brought presents.

The theme of Maddox's room is monkeys so I decided to take on a new challenge.  I found this pattern for this little guy online (for free) and he actually wasn't too complicated.  It took me about 6 hours in total and only minor frustration.  I used Lion Brand Yarn-Cotton Ease, which is super baby friendly and most importantly washable!  There are many different ways you can style this little guy, but I decided to keep it simple and make him the colors of Maddox's room.  You can't tell by the picture, but he has a navy blue strip on his shirt. 

The only downfall of this pattern is that is requires many different skeins of yarn, which doesn't make him cheap.  Although I have more than enough yarn to make him a friend if I ever decide to make another one. 
My boyfriend is dying for me to start selling these on Etsy, but honestly after one I am done for awhile. 

Congrats to Mandy, Aaron & Keller on their upcoming arrival!  : )

Paella

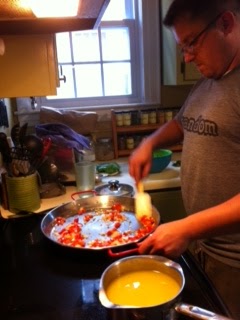
A couple of weeks ago Michael and I made our first attempt at paella.  I'm not going to say it was a total failure, but we have some work to do!  At least it looks pretty : )

Last year when we went to the Dominican Republic, we both had paella for the first time and completely feel in love!   Yum!  I made friends with a Cuban woman from Boca Roton, FL who assured us that it was super easy to make and that all you needed was a good pan.  She suggested on from William Sonoma which was gasp....$315....WAY out of our price range.  Apparently I forgot the fact that my Cuban friend was loaded.  So instead I ordered Michael one for Christmas last year from World Market, for less than $15, which suited us just fine!

My Cuban friend was right, it wasn't too hard.  First you saute the peppers, tomatoes and onions and then made a stock.  After both veggies and stock were done you combine the two.  Add rice and simmer, then add seafood and bake in the oven or cook on the grill.  Finally, garnish with parsley and lemons, or whatever your recipe calls for.  

The trick apparently is getting the rice just rice.  Our local grocery store of course didn't have Spanish rice so we had to us Arboria.  One of the many faults of living in an uncultured city.  I shouldn't blame the rice completely, but it was the rice that we didn't like.  Better luck next time!

I'm not going to post the recipe for this, because like I said it needed work, and I know that there is a much better one out there!


Tuesday, July 19, 2011

The Pig House Came to Town!

I have lived in Huntington for 10 years now, and in all that time my Weirton family had not been to visit me, not once.  Finally, after years of begging they came!  My house was completely filled to the max, Pat, Denise, Jenn, Mia & Gianna and Michael was also in from Charleston.  I took them to a children's art festival and then we had a "party" for Mia's 5th Birthday.  It was a hectic blast, just the way we like it : )  Hopefully it won't be another decade before they make another trip! 

Tuesday, June 21, 2011

Tomatoes!

My grandma always talked so fondly about how my grandpa always enjoyed his first tomato of the season right from his garden.  He would take his Morton salt with him and bite into it like an apple.  I remember partaking in this with him and thinking that he had a "special" kind of salt and to this day, even though I know better, it is the only type of salt I buy. 

After nothing but months of rain, I had only one tomato pop out early this year.  I treated my little survivor like a baby, and when it was finally ready I dragged it to Charleston with me so that Michael could be apart of the tradition (Gracie had a piece too).  We had it for a midnight snack (hence the pj's) and it was a fabulous as it looks!

Wednesday, June 8, 2011

Something Old, Something New

About a month or so ago I stopped into the Habitat for Humanity ReStore to donate a couple of things.  This was Michael's first trip there and he was completely overwhelmed with the amount of "stuff" they had and how reasonable it was.  We came across this headboard ($15), which I wanted to paint white and stick in my guest room, but Michael thought it would look better if we refinished it and stained it dark.  I agreed, but dreaded the extra work.  It was his plan to do it, but between his crazy work schedule and my expected company I went ahead and did it myself. 

I completely forgot to take a before picture, which sucks, but you can get a small idea of what it looked like before from the back of the headboard.  First I used a stain remover which I also bought at the ReStore for $10 and I still have over half left.  All I did was pour it on, let it sit for minute and scrub it with steel wool.  It took a couple of times, but this entire process took me less than 30 minutes. 

Next I went out it with my mouse, sander that is.  I started with a medium grade sandpaper and worked my way down.  This was actually kind of fun and only took about 15 minutes.  It would have taken less time, but there were a few nicks and dings I wanted to rub out. 

After being sanded, I wiped it down with a wet cloth and let it dry in the sun before staining.  The framing took two coats.  The inset part took a little longer because after it was stripped I discovered that it was particle board and not actually wood.  I did several layers, which took awhile to dry,  but I am super pleased with the way it turned out!


Every good carpenter needs a helper!  Gracie sunbathed while Mommy worked.  Michael did come to Huntington in time to help me connect it to the bed frame.  In total this project cost me less than $25 and I still have half a gallon of stripper left.  Not to mention one less thing in a landfill!  Now I just need something on the walls....

It's Grilling Time!

I have been harassing my boyfriend for months about trying to grill a pizza.  Well the stars finally came into alignment...we had one day with nice weather when Michael was actually in Huntington.  So I finally got my wish!

Grilled Apple & Pork Pizza:
1 12" pizza crust (we used Boboli, maybe later we will try homemade)
olive oil
1/2 lb boneless pork loin chops
1/4 Granny Smith apple
1/2 c BBQ sauce
1 c goat cheese
fresh parsley

Preheat grill to medium heat for about 10 minutes.  In the meantime, season pork and either cook on grill on in a skillet and slice thin.  Slice apple and place on grill for about 2 minutes, until tender. 

Spread BBQ sauce over crust, then add pork, apples, cheese and parsley.  Place pizza on grill four about 8 to 10 minutes. 

(This one had a little accident, I won't mention any names, but it was a lot prettier when it went on the grill, still tasted great!)


Thai Shrimp Pizza:
1 12" pizza crust
olive oil
1 c small raw shrimp cleaned
1/2 c green onion sliced
1 carrot cut julienne
1/4 c fresh cilantro chopped
1/2 c mozzarella cheese grated

Peanut Sauce:
1/4 c fresh lime juice with pulp
2 T sodium soy sauce
2 T green onion minced
1 T fresh cilantro minced
2 T crunchy peanut butter
1 T olive oil
1 T brown sugar
1 tsp fresh ginger minced
1/2 tsp lime zest grated
1/4 tsp red pepper flakes
2 cloves garlic minced

Preheat grill to medium heat.  Combine lime juice, soy sauce, onion, cilantro, peanut butter, oil, brown sugar, ginger, lime zest, red pepper flakes and garlic in a small pot or sauce pan.  Heat over low heat, stirring occasionally.  One warm add shrimp and stir gently until pink. 

Reduce grill heat to low. Brush grill rack with olive oil. Using the indirect grilling method, slide pizza crusts on grill and cook until golden, about 3 to 4 minutes until lightly browned.  Turn pizza crusts over. Top browned side of pizza crusts with shrimp mixture with liquid to preference. Sprinkle with green onions, carrot sticks and cilantro and cheese.  Cover with grill lid and heat pizzas about 5 minutes or until crust is golden on bottom.